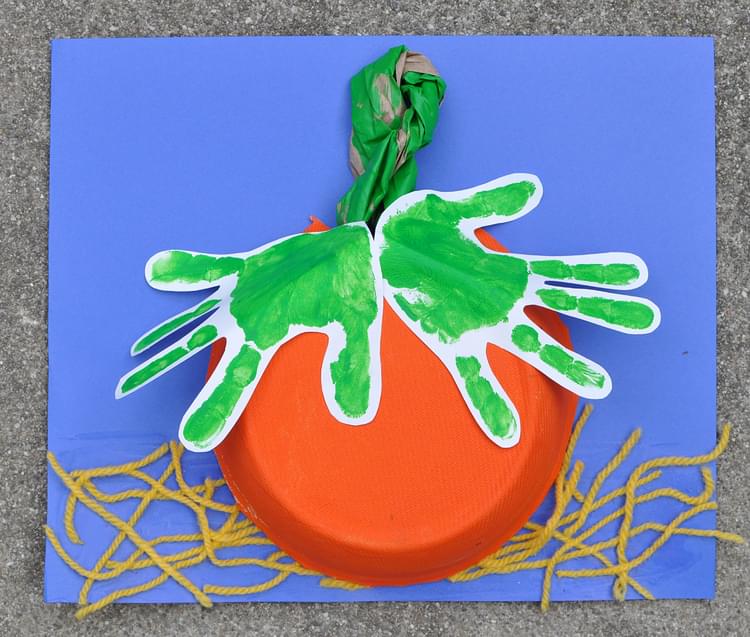
Pumpkin Bowl Picture
These pumpkins have handprint leaves - a fantastic Halloween or Thanksgiving project to do at home with your preschooler or in a preschool classroom. It incorporates both sensory and fine motor elements: making hand prints, scrunching up paper bags, and cutting and gluing yarn.

Project Info
| Difficulty | Easy |
|---|---|
| Duration | 15-30 minutes |
| Age | 3+ |
| Submitted by | |
| Share |
Materials
- Blue Card
- Brown Paper Lunch Bag
- Paint (Orange, Green)
- Paper Bowl
- White Glue
- White Paper
- Yellow Yarn
Instructions
- Paint the underside of the bowl orange
- Paint one face of the paper bag green
- Make small cuts into the rim of the paper bowl, about 0.5" apart, and fold inwards
- Cut a small triangle (with approx 2" sides) out of the edge of the bowl.
- Fold the paper bag in half and twist, leaving the ends untwisted. Push into the triangle that you cut from the bowl so that the untwisted ends are inside the bowl, secure with tape. See image
- Cut a variety of lengths of yellow yarn.
- Paint the bottom of the blue card with glue. And sprinkle the yarn pieces over (to form straw on which to place the pumpkin).
- Put glue on the folded rim of the pumpkin bowl. Now place in position on the blue card. Place an object on top of the bowl to hold in place until the glue dries.
- Finally, make two green hand prints, and cut out. Glue these to the base of the paper bag "stem" of your pumpkin.
Tips
- You could use shredded yellow paper instead of yellow yarn to form the straw (or real straw!).
Reviews
✶✶✶✶✶
Not yet reviewed
Useful supplies
- our picks from Amazon for this project:Related Books
- our picks from Amazon for this project:Related Projects
Project Themes
- Letters M-P: Letter P
- Events and Other Celebrations: Halloween
- National Holidays: Thanksgiving
- By Age: For Preschoolers For Toddlers
- By Gender: For Boys and Girls
- Plants: Pumpkins
- Seasons & Weather: Autumn Fall


