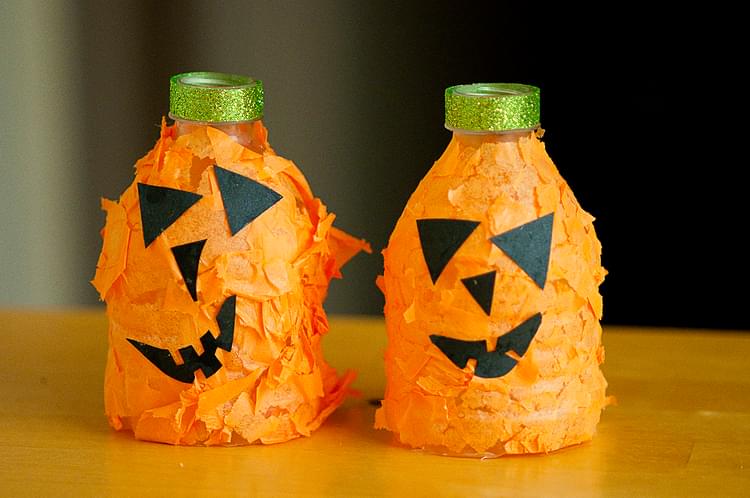
Jack o Lantern Bottle
I love these little Jack o Lanterns - easy to make and so cute as decorations for your Halloween table.

Project Info
| Difficulty | Slightly challenging |
|---|---|
| Duration | 1 hour |
| Age | 5+ |
| Submitted by | |
| Share |
Materials
- Battery Operated Tealight (optional)
- Black Paper
- Green Ribbon (or Green Paper cut in strips)
- Orange Tissue Paper
- Paint Brush
- School Glue (e.g. Elmers)
- Small Plastic Water Bottle - washed and dry
Instructions
- Cut the bottom off of the plastic water bottle
- Tear a sheet of orange tissue paper into lots of little pieces
- Put some glue into a plastic bowl and using a paint brush paint the entire surface of the bottle with glue
- Place a piece of tissue paper on the water bottle. Continue until the whole bottle is covered in tissue paper
- Glue a green ribbon around the neck of the bottle (to form the pumpkin stem)
- Cut out face shapes (eyes, nose, mough) from black paper, and stick on the bottle.
- Place the empty bottle on top of a battery operated tealight and let your jack o lanter shine!
Tips
- WARNING: Never try to put a real candle inside a plastic bottle - fire could result.
- The smaller you tear the tissue pieces, the better for this activity.
Reviews
✶✶✶✶✶
Not yet reviewed
Useful supplies
- our picks from Amazon for this project:Related Books
- our picks from Amazon for this project:Related Projects
Project Themes
- Events and Other Celebrations: Halloween
- By Age: For Elementary / Primary School
- By Gender: For Boys and Girls
- Plants: Pumpkins


