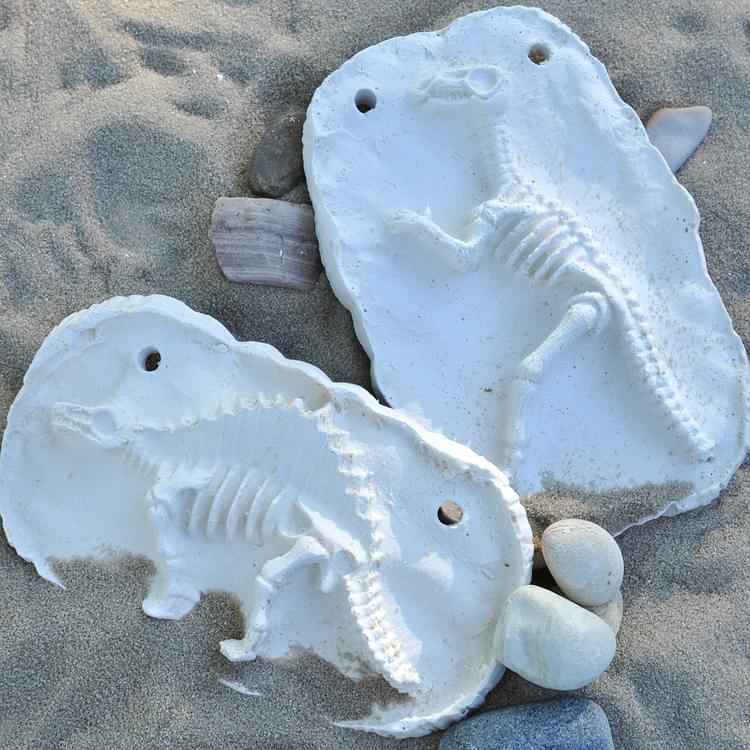
Dinosaur Fossils
Little dinosaur lovers and wannabe geologists will just LOVE creating these dinosaur fossils. The project is so easy that even older preschoolers can do it with a little help. A great project for a dinosaur theme in the classroom, to do with a small group at a dinosaur party, or just because!


Project Info
| Difficulty | Easy |
|---|---|
| Duration | 15-30 minutes |
| Age | Any |
| Submitted by | |
| Share |
Materials
- Drinking Straw, cut into 1 inch lengths (Optional)
- Plaster of Paris
- Play Doh
- Small Foil Container (slightly larger than your dinosaur - e.g. 5"x3")
- Toy Plastic Dinosaur
Instructions
- Press your play dough into the base of your foil container, so that the base of the container is completely covered with a layer of playdoh about half an inch thick.
- Gently push your dinosaur into the playdoh and carefully remove. An impression of the dinosaur will have been left behind.
- Optional: If you would like to be able to hang your dinosaur fossil: push 2 1" lengths of drinking straw into the play dough where you would like holes to be present in the final fossil (so that you can hang the fossil with string)
- Make up the plaster of Paris with water according to the package instructions. You will need approximately 6 -8 tablespoons of plaster of paris if your tin foil container is 5"x3"
- Carefully pour the plaster of paris on top of the playdoh. Using your finger carefully smooth the surface of the playdoh ensuring that it covers the entire surface of the playdoh. You need the plaster to be at least half an inch thick otherwise the fossil will easily break.
- Allow to dry. If you place in the sun, this could be as little as 30 minutes. However, if you want to be sure that the plaster is hard and that your fossil will not break leave for at least an hour, or ideally overnight.
- Carefully turn the fossil out of the foil container. Remove the playdoh, using a toothpick to remove from hard to reach areas.
- It is straightforward to do this project in in a classroom or with a group of kids at a party with a little planning and preparation. First measure the playdoh into balls - 1 per child to ensure that each child will have enough playdoh to cover the base of their foil container. Then measure the correct amount of dry plaster of paris into ziplock bags. And now measure the correct volume of water into small cups. You should have one ziplock bag of plaster of paris and one cup of water per child. When the child is ready to make the plaster of paris they can (with assistance) simply pour the water into the bag, seal it, and massage until incorporated. When it is mixed, cut off a small hole in the corner of the bag and allow the child to squeeze the plaster into the container - and then smooth with their fingers.
Tips
- These fossils look particularly great if you use toy skeleton dinosaurs but you can use any toy plastic dinosaur. Plastic Bugs (e.g. worms) make great fossils too. You can also do dinosaur footprints by simply making impressions of dinosaur feet.
- The playdoh will absorb some of the water from the plaster which will make it a bit slimy. If you are having trouble removing it, leave to dry first for about half an hour. DO not leave too long, otherwise it will become caked on and impossible to remove!
- To make this project more cost effective, make your own playdoh. Search broogly.com for playdoh recipes.
Reviews
✶✶✶✶✶
Not yet reviewed


